


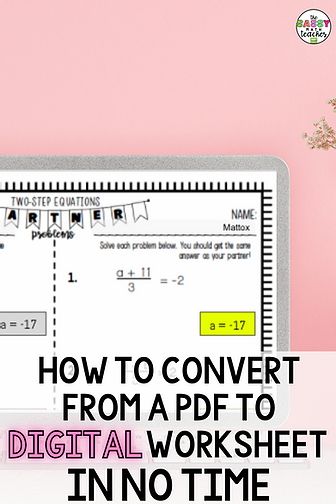
Do you have printable activities that you can’t use in virtual learning? Look no further! Keep reading if you would like to learn how to turn your pdf or hard copy worksheet into an editable digital worksheet THE EASY WAY!
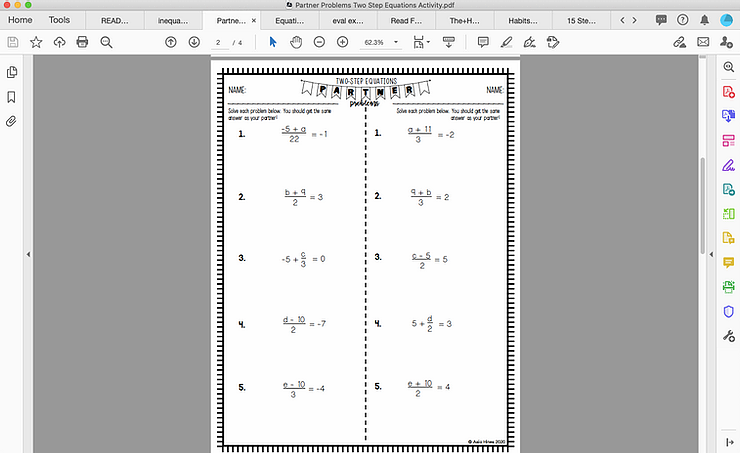
Before we get started, if the worksheet is a hard copy, you need to start by using your phone to take a photo to convert it into a pdf.
To do this, you can use the app CamScanner or if you have an iPhone, use the built-in Notes app.
I suggest starting with the video above to watch me as I convert a pdf to a digital worksheet and then continue scrolling to follow along with the steps!
Take a screenshot of each page and save them on your computer.
To take a screenshot on a Mac: Use the keyboard shortcut shift + command + 4, then drag your cursor over the portion of your screen that you want to screenshot.
To take a screenshot on a PC: Use the snipping tool!
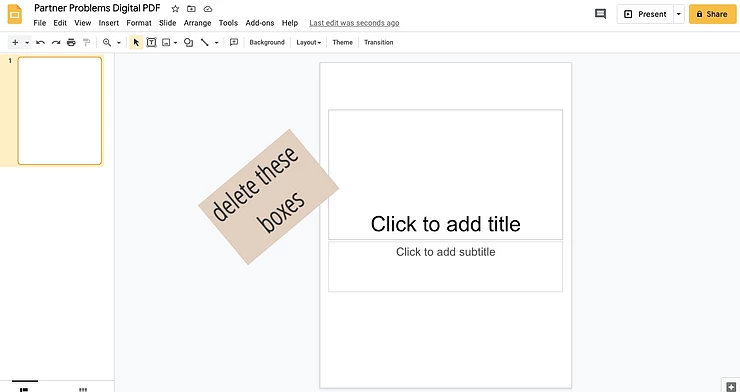
Go to Page Setup to adjust the page size to 8.5 in x 11 in.
Next, delete the two text boxes that you see.
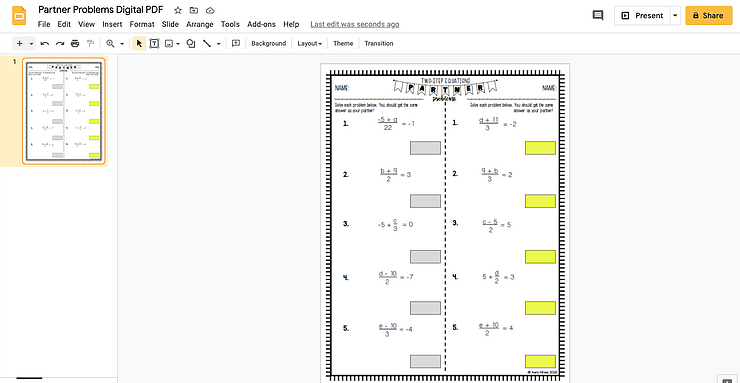
Change the background of your Google Slides or Microsoft PowerPoint to your screenshot images!
To do this…
In Google Slides, right-click and select Change Background, then use Upload to insert your image.
In Microsoft PowerPoint, choose picture and then insert!
Your images are now locked so that they cannot be manipulated by students.
Now that your background is locked, add text boxes to each question for students to type their answers in.
You can just do this once and then copy and paste (or duplicate for all other questions).
I like to add color and a clear border to each text box to ensure that students see the boxes.
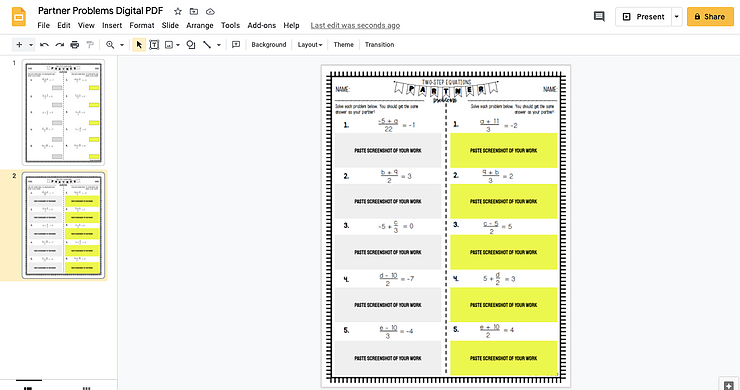
Duplicate your slide(s) and delete the text boxes. Add in new text boxes as space-savers for student work.
Export the slide as an image and then upload it as the background.
Delete the space-savers after you upload the image as your background.
Share your Google slides presentation or Microsoft PowerPoint via your learning platform! That’s it!
I hope these quick steps helped you turn your pdf into an editable worksheet. If you still have questions, please leave them below!
Interested in my free step-by-step guide to creating a drag and drop activity?
Click here or the image below!
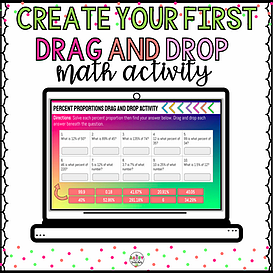
Download the free guide now!

I’m Asia! I’m all about making middle school math less work for you and more fun for your students. I’ve got tons of ready-to-go activities for grades 6–8 that keep kids engaged while you keep your sanity.
Welcome to my Blog!
I started The Sassy Math Teacher to help teachers like you increase classroom engagement and teach middle school math with confidence!
I also love to share about my life as a teacher including my favorite outfits, home items, gadgets and trips!


2 Responses
I learned something new! Thank you. Can you please explain how the students it will work together if it’s digital? Could you break it down step by step?
Hey Melanie! Students would have a link to the shared file and work on it concurrently. 🙂 One student could open the document and then share the link with their partner. Does that make sense?