


I learned to make math beautiful worksheets because I had a hard time finding math worksheets that were “just right” for my students. I too have spent hours on Pinterest and TeachersPayTeachers looking for the perfect fit. Keep reading if you want to learn the basics of how to make different types of worksheets including math worksheets for your students! In this blog post, I will be sharing some of the easy ways to use software that you probably already have on your computer to make your own worksheet activity. I can’t wait for you to learn these new skills. If you want to keep learning how to make awesome worksheets and other classroom printables, make sure you grab my free guide here.
You will need three things before we get started:
1. Microsoft PowerPoint
I know what you’re thinking, “Don’t you mean Microsoft Word?
No, I mean PowerPoint! No word documents are needed!
You’re probably also thinking, “Isn’t PowerPoint for presentations?”
Nope! PowerPoint is for so much more than just presentations! There are so many different ways you can make your own materials in PowerPoint! It is truly the perfect tool to use.
Note: (You will need to use the desktop version, not Office 365.)
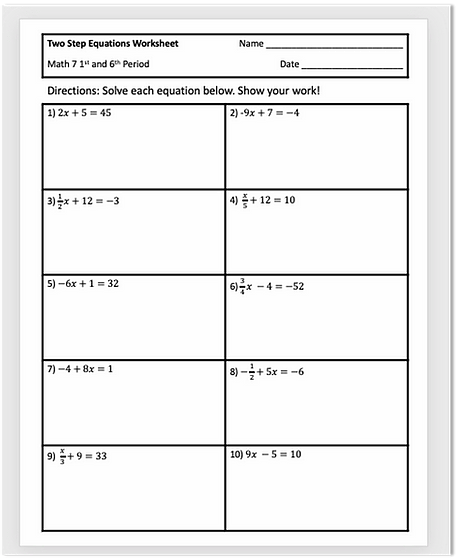
2. Any topic (I will be doing two-step equations)
3. The mindset that you can do this!
Okay, ready? Let’s go!

The first thing you need to do is start with a New Blank Presentation to start. This will be the base of our blank worksheet assignment.
a. Select and delete the two text boxes.
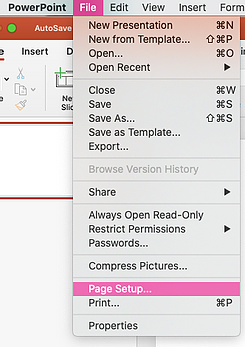
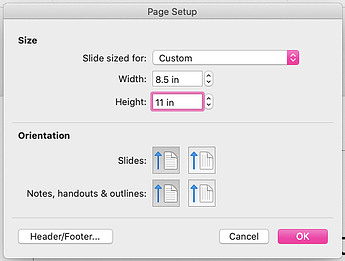
b. Next, we want to change the page size. Next, go to File → Page Setup…→ change Width to 8.5 in and Length to 11 in (This makes it Paper Size) (This makes it the size of a piece of paper in portrait.) The dimensions will ultimately depend on your desired worksheet layout. You can switch those numbers to make your page landscape instead!
If a box pops up to ask if you want to scale up or scale down, choose Scale Up.
We will need two tables, the first one is for the heading/worksheet title. The second table is for math problems.
You will also insert a text box to type in the student directions.
Go to Insert → Table → 2 x 2

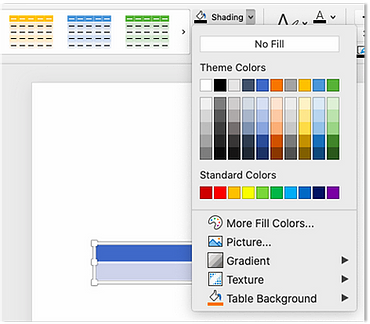
Make sure the table is selected. Click shading to change the background color of the table to No Fill.
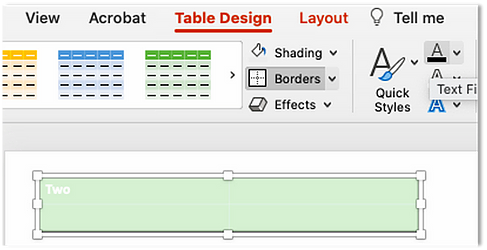
Next, click Borders and choose Outside Borders.

With the table still selected, change the font color to black! It is okay that you do not have any text yet! You can not see them, but there are still 4 cells. You can click on the table in the general area.
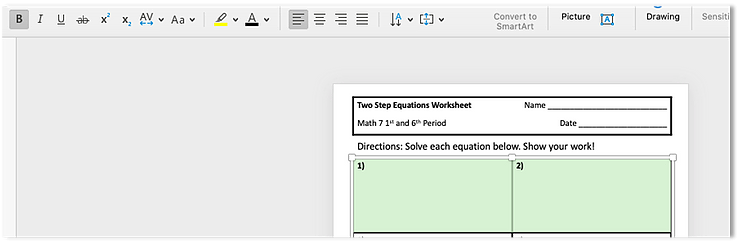
Click into the top-left cell of the table, type the title or math topic.
Select the bottom-left cell of the table, you can either leave it blank or type the name of the class.
Click into the top-right cell of your table, type Name followed by underscores to create a line.
Select the bottom-right cell, type Date followed by underscores to create a line.
After typing everything in, highlight the right column and align them to the right.
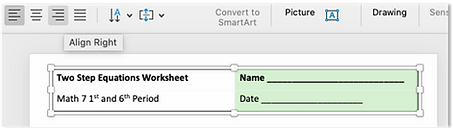
You should notice the text in the top row is bold. I leave the title in bold text, but remove the boldness from Name.

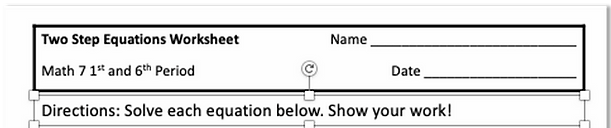
Add a text box just below the title heading table you just made. This is where we will type the directions for students.
Insert Table → I want 10 problems so I am doing a 2 x 5 table.
Change the color of the table shading to No Fill and select All Borders.
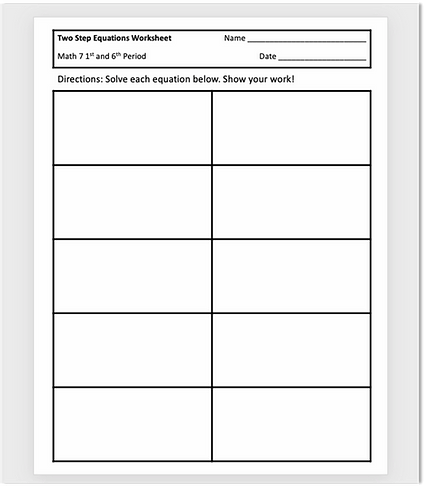
With the table still selected, change the font color to black.
At this point, I like to stretch the table to fill the page. You could also do this in the end.
Type your question numbers into each cell!
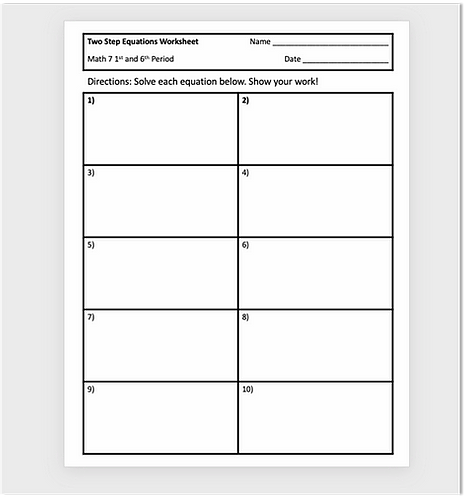
Highlight the top row to remove the bold text.
Time to add our math problems! For this, we will use the Equation Editor built into Microsoft PowerPoint.
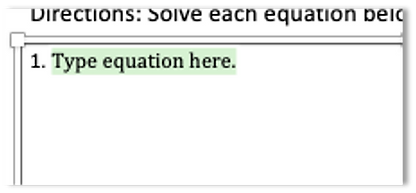
a. Place your cursor to the right of 1) in your first cell to start creating your first math problem.
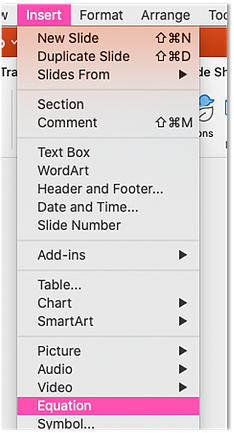
b. Go to Insert and go down to Equation.
c. Highlight the “Type equation here” text and replace it with your math equation.
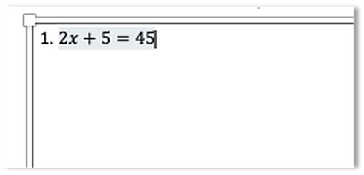
d. Repeat steps a – c for the nine remaining problems!
To save as PDF:
Go to File → Save As → Change File Format to PDF (Don’t forget to name your file!)
To print:
Go to File → Print
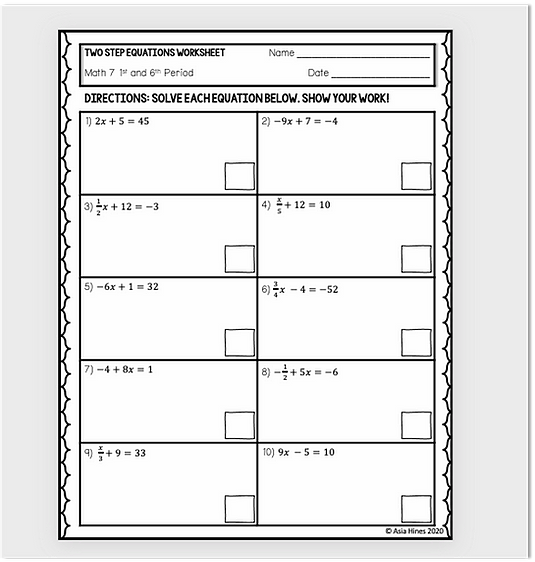
You can do this by changing the fonts and adding a fun border as your background. You could also add space for students to write their answers by adding a shape to each cell! See below! 🙂 If you want to be digital, you can also add some vibrant colors!
Creating templates for a variety of different worksheets (basically the worksheet before you add questions) will save you so much time in the long run. Learn more about Powerpoint and Google Slides Tips and Tricks in my free download.
That’s all for now, I hope this post was helpful! I would love to see what you created.
Share it with me on social media! Post it to your Instagram story and tag me @thesassyteacher 😀

I’m Asia! I’m all about making middle school math less work for you and more fun for your students. I’ve got tons of ready-to-go activities for grades 6–8 that keep kids engaged while you keep your sanity.
Welcome to my Blog!
I started The Sassy Math Teacher to help teachers like you increase classroom engagement and teach middle school math with confidence!
I also love to share about my life as a teacher including my favorite outfits, home items, gadgets and trips!


3 Responses
Hi, Asia, thank you so much for this. I only have office 365. Why did you say we cannot use it? Please respond. Thank you.
Hi Teri, The browser version of PowerPoint (Office 365) is just very limiting in my experience! If you are able to find success with these steps inside Office 365, please let me know!